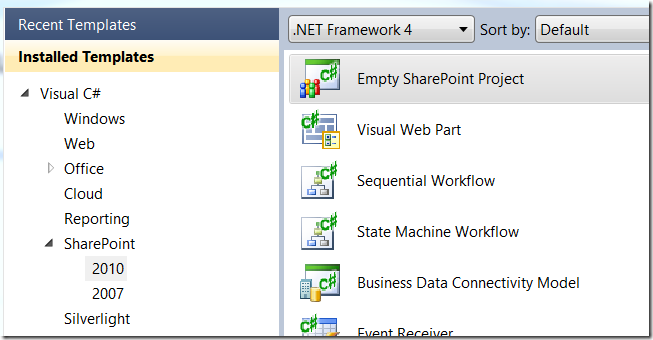
Since the release of Visual Studio 2010 and SharePoint 2010 I have done all my SharePoint development on a machine that had both applications installed locally. This certainly makes it easy as the development tools are loaded locally with the SharePoint environment, allowing easy deployment and debugging.
Visual Studio includes a collection of project templates and project item templates targeted at SharePoint 2010 and 2007 
But these only show up if you have Visual Studio 2010 installed on a machine that has SharePoint 2010 installed.
My challenge, I recently updated my development environment using Windows 8 Consumer Preview as my base OS…why? So that I can run my SharePoint hyper-v images and utilize snapshots from within my client OS where I run all my daily business applications.
For my SharePoint VM I have a full development environment installed just as I had before but I also want a developer environment on my client OS so that I can develop desktop and metro applications as well as continue to open and create my SharePoint development solutions.
In order to do this I need access to the SharePoint tools and project templates. Luckily I do not have to install SharePoint 2010 to get Visual Studio to show the SharePoint project templates in the New Project dialog…
First we need to replicate some registry settings that are created when you install SharePoint. To do this you can simply export [HKEY_LOCAL_MACHINE\SOFTWARE\Microsoft\Shared Tools\Web Server Extensions\14.0] from a SharePoint 2010 server using regedit and then import the results to your local client.
Second you need to copy the SharePoint 14 Hive to your local machine so you have the DLLs necessary. You can simply copy “C:\Program Files\Common Files\microsoft shared\Web Server Extensions\14” from a SharePoint 2010 server to your local machine.
After you have the registry settings and the files from the hive all you need to do is register the SharePoint DLLs with the GAC. To do this quickly, open a Visual Studio Command Prompt as an administrator and run this command to register all the DLLs that you copied
FOR %a IN (*.dll) DO GACUTIL /i %a
Once the DLLs have been copied and registered, simply restart Visual Studio and you should see the SharePoint 2010 project templates in the New Projects dialog.
Note: This should allow you to open any existing project but you will still get errors when trying to add specific project items that need to communicate with the farm, like Event Receivers. You will also have errors creating new projects from project templates that need to communicate with the farm.

