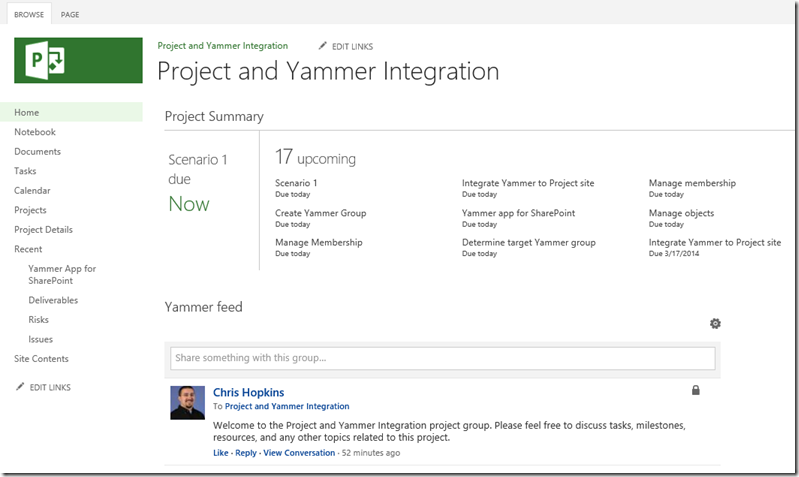
Today when you create a new project in Project Online or Project Server you are essentially creating a new SharePoint site that is hosting all the content for your project.
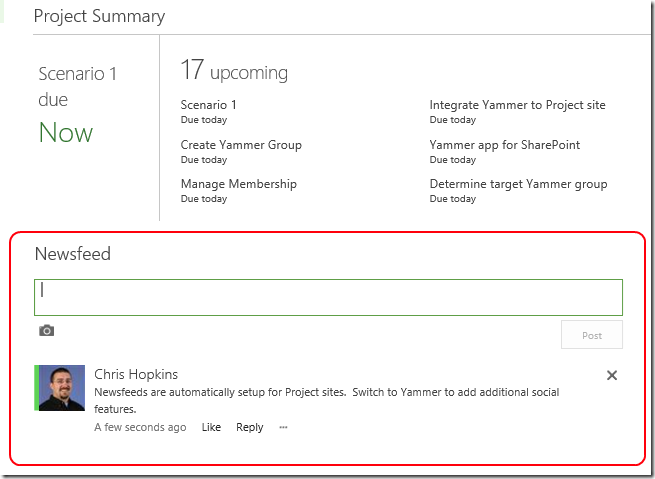
Right away you might notice the Newsfeed app that is on the project site home page by default (as shown below).
If you want to dramatically enhance collaboration amongst your project team members and maybe even members outside your project team I suggest you switch from the Newsfeed app to Yammer.
Note: In the following scenarios I am assuming that you have created a project in Project Online or Project Server and have authority to modify the pages on that site.
How To
The easiest way to integrate Yammer with your project site is to create a Yammer group specifically for your project. This group can be the hub for conversations and collaboration amongst the project team members. You can even allow people from other parts of the organization participate if desired.
1. Create your Yammer project group
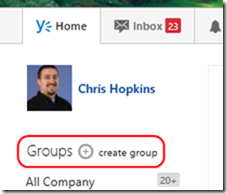
Creating a group is easy. Just click the Groups + button
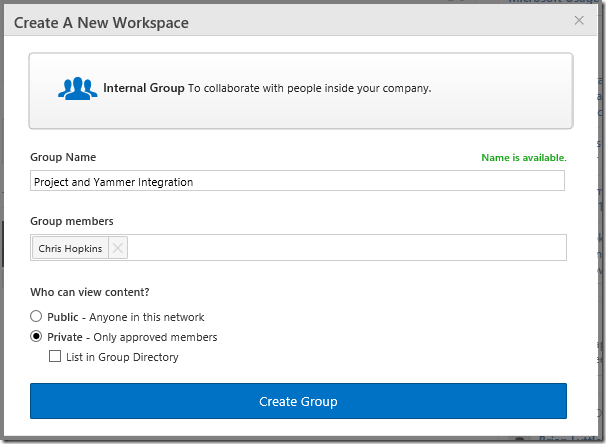
Give the group a name, invite the project team members, and choose if this group is public or private based on your requirements.
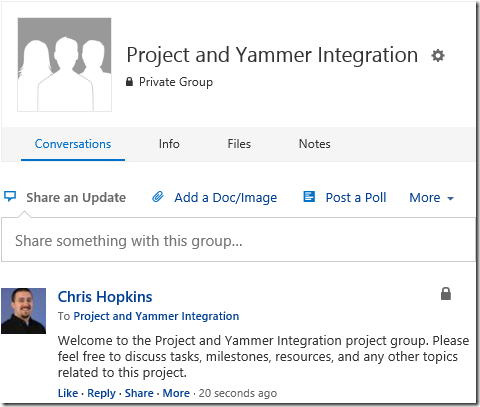
The members of this group can now use all the social capabilities of Yammer to manage discussions and content relevant to the project.
Let’s now look at how we can replace the Newsfeed for our project with this new Yammer project group.
2. Get the Yammer group id
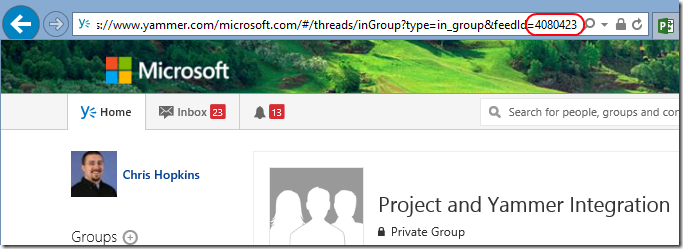
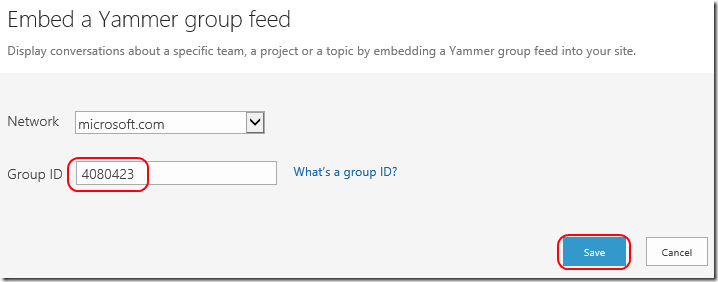
We will need to know the ID of the group so we might as well get that now while we are still in Yammer. The ID of the group is located in the URL and is identified by the feedId= parameter at the end, ex. 4080423 (as shown below). FYI – every group has a unique id so make sure you get the right one.
3. Get the Yammer app for SharePoint
Before we can add this new Yammer group to our project site, we need to get the Yammer app for SharePoint. This is a fast and simple process.
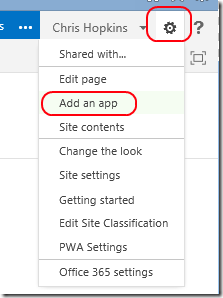
Click on the Site Options icon in the upper right of the web page.
Click on Add an app
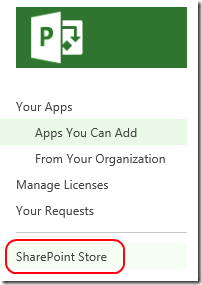
On the apps page, click on SharePoint Store in the left hand navigation pane
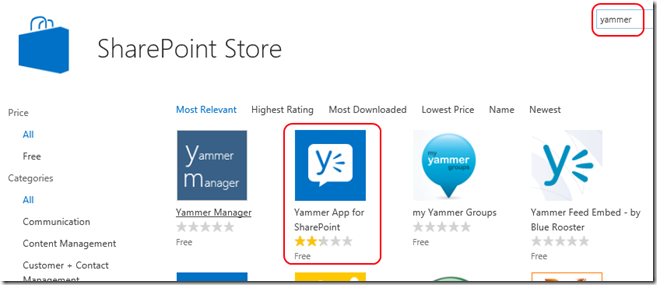
Find the Yammer app for SharePoint by searching on Yammer.
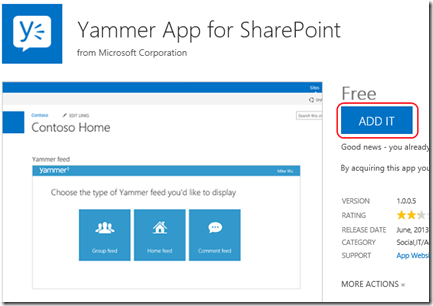
When you find it, click on its tile to see the details about the app.
Here you can click the ADD IT button
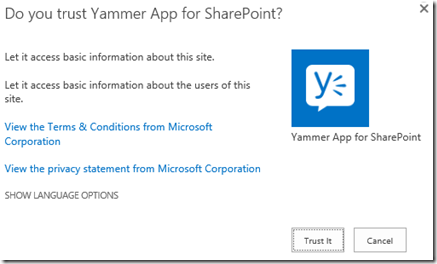
Then click on Trust It
and the Yammer app for SharePoint will be added to your site.
4. Add the feed for your Yammer group to your project site’s home page
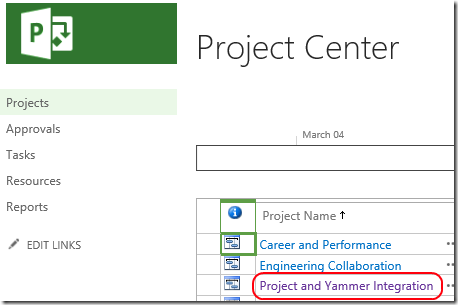
Now that you have the Yammer app for SharePoint, navigate to the site home page for the project by clicking on the name of the project from the list of projects in the Project Center.
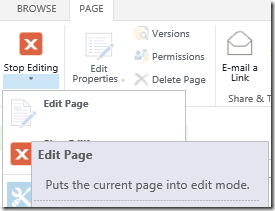
Choose to edit the page by clicking the Edit Page option from the Page tab in the ribbon
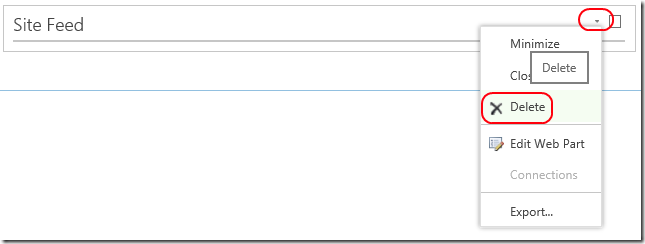
Remove the Newsfeed web part from the page by clicking the options button and clicking Delete
Add the Yammer feed web part by clicking Add a Web Part from the Left zone where you just removed the Newsfeed web part
Choose the Yammer feed app from the Apps category in the ribbon
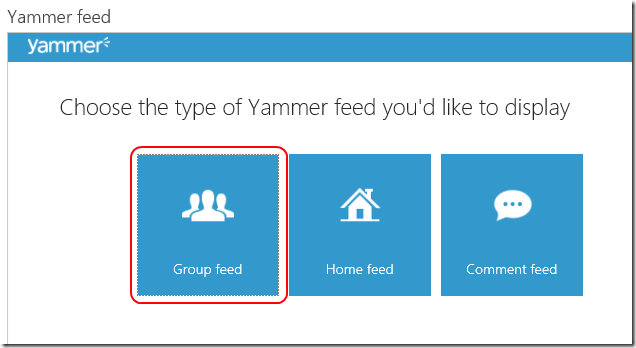
In the new Yammer web part, click on the Group feed option
Make sure the Network is correct and then add the Group ID (the feedId value we copied earlier) and click Save
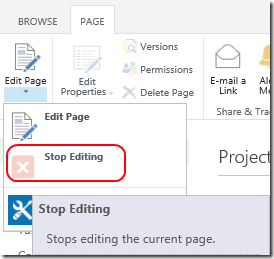
Now you can click on Stop Editing from the Page tab in the ribbon
…and now you have the Yammer project group integrated directly into the site for that project.
The functionality provided by Yammer can dramatic boost collaboration and productivity. Don't just take my word for it, see what others are saying about the capabilities and benefits that Yammer provides for project management…
http://www.techrepublic.com/blog/it-consultant/six-reasons-to-use-yammer-for-it-project-management/
https://about.yammer.com/yammer-blog/project-management-a-circus-or-a-symphony/
http://yammer.psu.edu/2012/06/yammer_use_case_project_management/

