Sorry that I haven’t been posting frequently since Thanksgiving -- it gets super busy around the holidays, and unfortunately, my blogging time has suffered. I can’t promise that it will get better through December, especially since I’m planning a work-free holiday around Christmas but I will resume full blogging frequency in the new year. Tonight I wanted to talk about another MSDN diagram that a blog reader liked and wanted to know how to recreate in Visio.
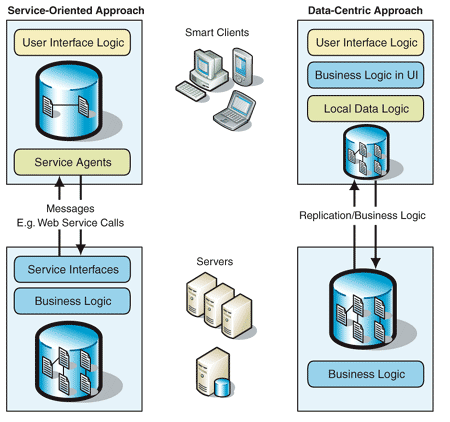
Take a look at this image.

Let’s look at the Smart Client and Server shapes first. To find these shapes, open the File menu, click Shapes, select Network, and then choose Computer and Monitors from the list. These shapes don’t have the same color on the monitors (obviously touched up by a designer) but apart from that the representation is pretty faithful.

If you really want to put something on the PDA screen, as in the MSDN diagram, you can ungroup the shape, select the screen and then draw or paste a bitmap that looks like a PDA application. Same technique goes for applying something on the screen of the other client machine shapes.
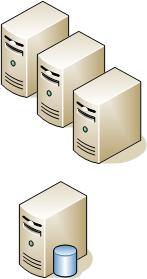
The Server shape is taken from the Servers stencil (open the File menu, click Shapes, select Network, and then choose Servers from the list).

The diagram reuses the database shape with a document in it. There’s a couple database shapes in Visio but the one that I like is in the Active Directory Sites and Services stencil (open the File menu, click Shapes, select Network, and then choose Active Directory Sites and Services from the list).
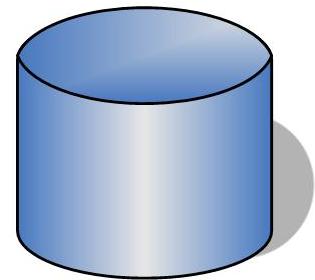
This one took a little work to get it to the same state as the MSDN diagram. I made the following changes:
1. Remove the default “database” shape text.
2. Changed the fill to a nice blue
3. When I changed the fill, I lost the dimensionality of the shape. I had to re-create it by hand, by taking two ellipse shapes, fitting them to the top of the database shape, and then using the Fragment operation in Visio to create a neat "top". I then set the new shape on top of the database shape.
4. I used a gradient fill of 26 on the main part of the shape and a gradient fill of 32 on the top part of the shape.
5. I made the line around the shape a weight of 9 pt.
6. I added a shadow by created a variant of a half-moon shape and moving it in back of the database.
I’ve added this custom database shape to my Visio document if you want to grab it without going through all those steps. Here’s what it looks like:

For the documents in the database, I just used the Document shape from the Enterprise Applications stencil (open the File menu, click Shapes, select Software, and then choose Enterprise Applications from the list). The MSDN document shape is nicer, but I liked the effect of the simple white document in my diagram too.
The rest of the shapes are standard Visio shapes, like text blocks and connector arrows. If you’re interested in doing the rounded corners on the rectangle boxes, that’s easy to apply. Drop the rectangle shape on the page, right-click on the shape, select Format, and then Line. In the dialog, look for the Round Corners selection and select the rounding you prefer. While you’re in the dialog, you can also fill the shape with the same colors as the MSDN diagram.
-- Mai-lan
This posting is provided "AS IS" with no warranties, and confers no rights
